Chiao's
IMPORTANT!
- Have in your mind when performing a Chiao, how loose is my hand how tight is my arm.
- Always maintain an action angle when performing the Chiao pathways, this will avoid hyperextending the limb's causing injury.
- The path descriptions below refer to the path between the Chiao's static position to the next Chiao's static position.
| x | Yin Pa |
Static Position
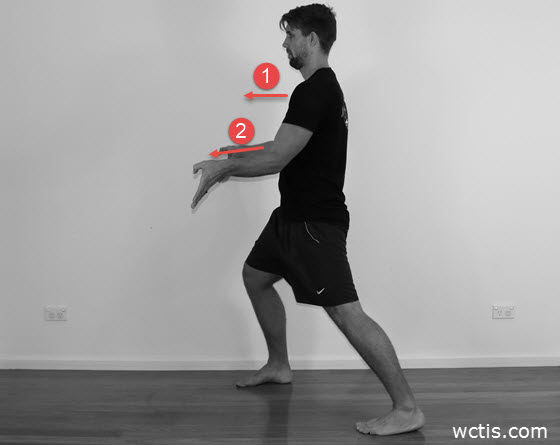
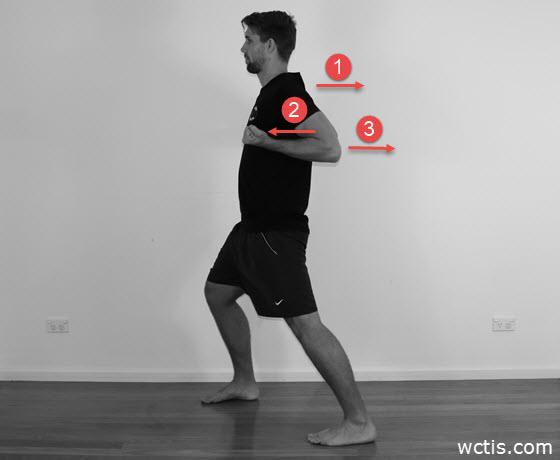
- Image 2, Line 1, Hoi (shoulders) forward.
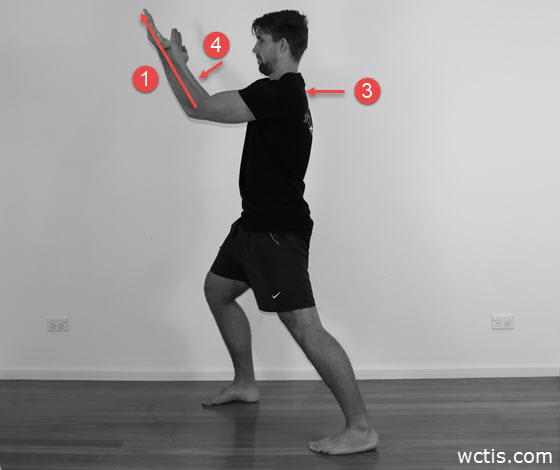
- Image 1 and 2, Line 2, the forearms are out and down on 45° angles; this also shows the Yin of the Forearm facing up.
- Image 1, Lines 3, both elbows will be about a fist distance from the rib cage.
- The hand will be using a Hook Hand, with the palm facing forward.
Image 1
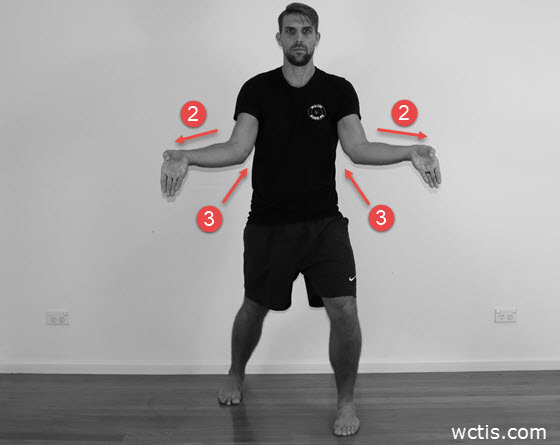
Image 2
Path
- Start in
Yin Pa static position. - Maintain the Hook Hand shape throughout the path.
- The hand comes outward and upward in a circular motion sweeping across the face.
- The hand then heads out on a 45° angle forming what is known as the horses head.
- The hand then comes around and down past the groyne area in a half circle motion.
- Then push back out to end in a
Yin Pa static position.
| w | Yang Pa |
Static Position
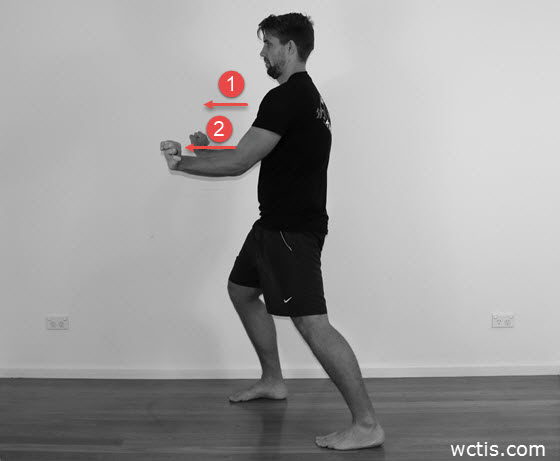
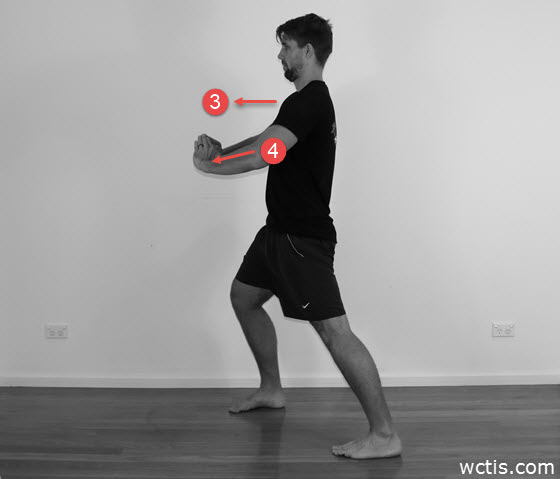
- Image 4, Line 1, Hoi (shoulders) forward.
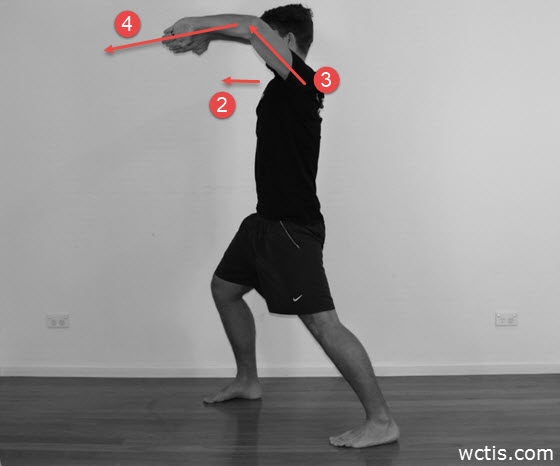
- Image 3 and 4, Line 2, the forearms are out and down on 45° angles; this also shows the Yang of the Forearm facing up.
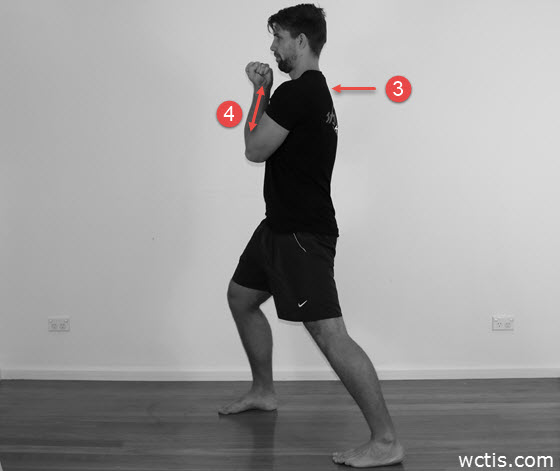
- Image 3, Lines 3, both elbows will be about a fist distance from the rib cage.
- The hand will be using a Ginger Fist.
Image 3

Image 4
Path
- Start in
Yang Pa static position. - Form a Cup Open Hand.
- As you rotate the shoulder forward, start to scoop slightly down to about the groyne level.
- Then start to bring the hand up the centre line of the body until the palm of the hand is facing the face.
- As you rotate the shoulder back, the hand will roll around to face 180° in the opposite direction while forming a Ginger Fist.
- The hand pulls down until the forearm is parallel to the floor.
- The hand then pushes out
- End in a
Yang Pa static position.
| n | Yin Saye |
Static Position
- Image 6, Line 1, Hoi (shoulders) back.
- Image 6, Line 2, the Yin of the Forearm will be facing up.
- Image 6, Line 3, the elbow is pushed back behind you until the forearm is parallel to the floor.
- The hand will be using a Rams Head Fist.
- Image 5, Line 4, the fist is tucked in close to the rib cage.
Image 5
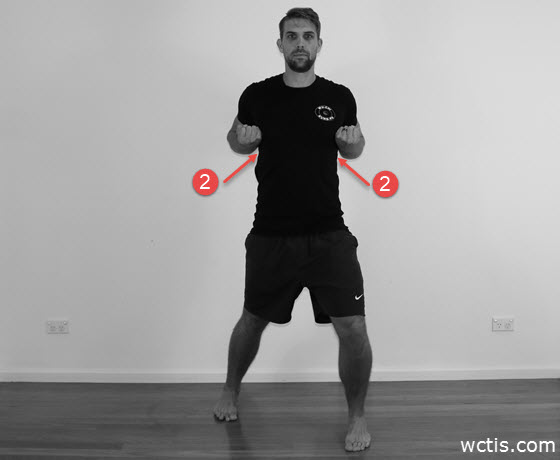
Image 6
Path
- Start in
Yin Saye static position. - Form a Cup Open Hand.
- As you rotate the shoulder forward, start to reach down to the ground to about the groyne level with the Yin of the Fist facing forward.
- Then grab a Rams Head Fist.
- Draw the hand up the centre line to the Du Chi.
- Then begin to create a forearm diameter Yang Circle up past the face.
- Once you reach a 12 o'clock position with the forearm, you will start to pull the elbow back behind you.
- End in a
Yin Saye static position.
| q | Yang Gau |
Static Position
- Image 11, Line 1, the Yin of the Forearm is facing outward, Yang of the Forearm facing in.
- Image 12, Line 2, Hoi (shoulders) forward.
- Image 12, Line 3, the arm is pushed forward, so the elbows are at about the level of the forehead.
- Image 12, Line 4, the forearm and the Flat Open Hand should create an invisible line the targets the throat of Nan Da
Image 11
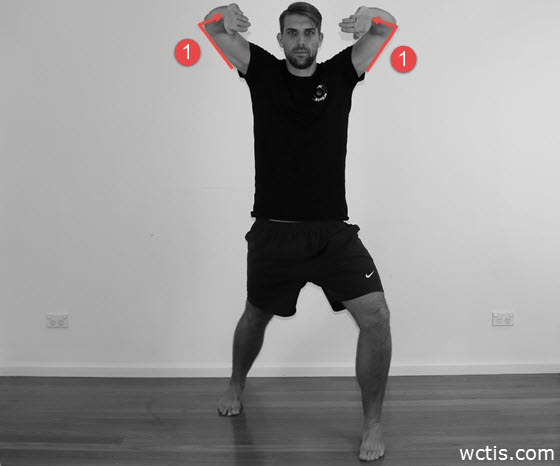
Image 12
Path
- Start in
Yang Gau static position. - Form a Cup Open Hand.
- Drop the elbow down toward the rib cage while the hand flows around a ball shape in front of the face and chest.
- Once the hand reaches the groyne level, the palm of the hand will be facing up, start to push the hand out on a 45° angle away from the body.
- Once the hand is extended out in front of the body roll the hand over 180° so you are looking at the back of the hand.
- Then draw the elbow back
- End in a
Yang Gau static position.
| c | Yin Hoi |
Static Position
- Image 13 and 14, Line 1, Flat Open Hand seeking up and out on a 45° angle.
- Image 13 and 14, Line 1
Flat Open Hand lines up with the forearm. - Image 13, Line 2, elbows are in as close as possible together.
- Image 14, Line 3, Hoi (shoulders) forward.
- Image 14, Line 4, the Yin of the Forearm is facing up.
Image 13
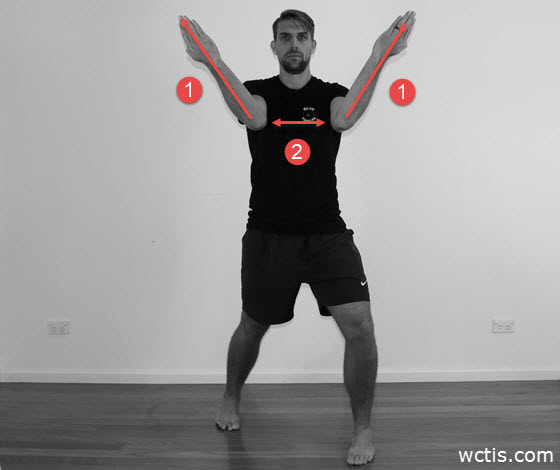
Image 14
Path
- Start in
Yin Hoi static position. - Roll the hand over so the Yin of the Hand is facing downward.
- Move the forearm in a Yang Circle until you reach 6 o'clock.
- Start to scoop the hand out on a 45° angle towards the opposite side.
- Then continue the Yang circle.
- End in a
Yin Hoi static position.
| b | Yin Ghe |
Static Position
- Image 17, Line 1, the Yang of the Forearms are facing in towards each other.
- Image 17, Circle 2, shows a Rams Head Fist with the Yin of the Fist facing in towards the throat.
- Image 18, Line 3, Hoi (shoulders) forward.
- Image 18, Line 4, the Yin of the Forearm is facing out.
Image 17
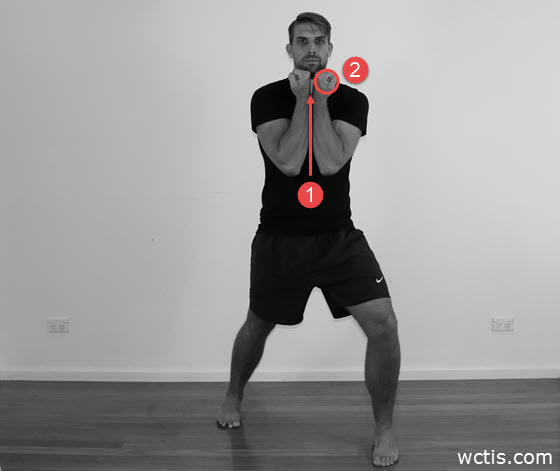
Image 18
Path
- Start in
Yin Ghe static position. - Reach out in front of you with while rolling the Grabbing Hand over.
- The Yin of the Forearm should be facing outward, so the thumb is facing the ground.
- Grasp the
Grabbing Hand . - Pull and roll the arm back in.
- To end in a
Yin Ghe static position.
| r | Yang Hsia |
Static Position
- Image 23, Circle 1, shows the ball shape formed by the Cup Open Hands.
- Image 23, Lines 2, both elbows will be about a fist distance from the rib cage.
- Image 24, Line 3, Hoi (shoulders) forward.
- Image 24, Line 4, show the hands are out in front and the Yang of the Forearm is facing up.
Image 23
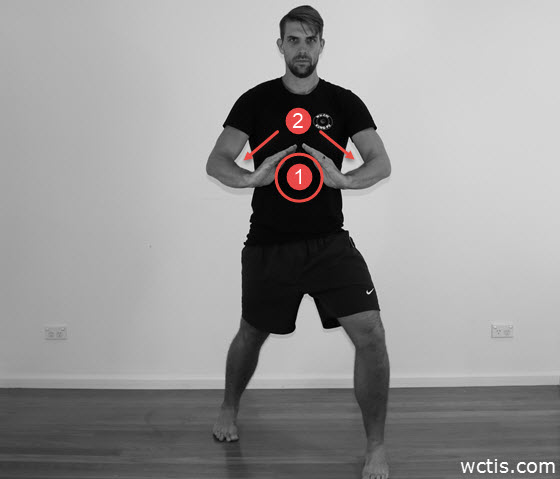
Image 24
Path
- Start in
Yang Hsia static position. - Roll the hand over in an Yang Circle direction so the palm of the hand is facing up.
- Drop the hand down and out to the side in a Yin Circle.
- Continue the
Yin Circle for a full circle. - To end in a
Yang Hsia static position.